

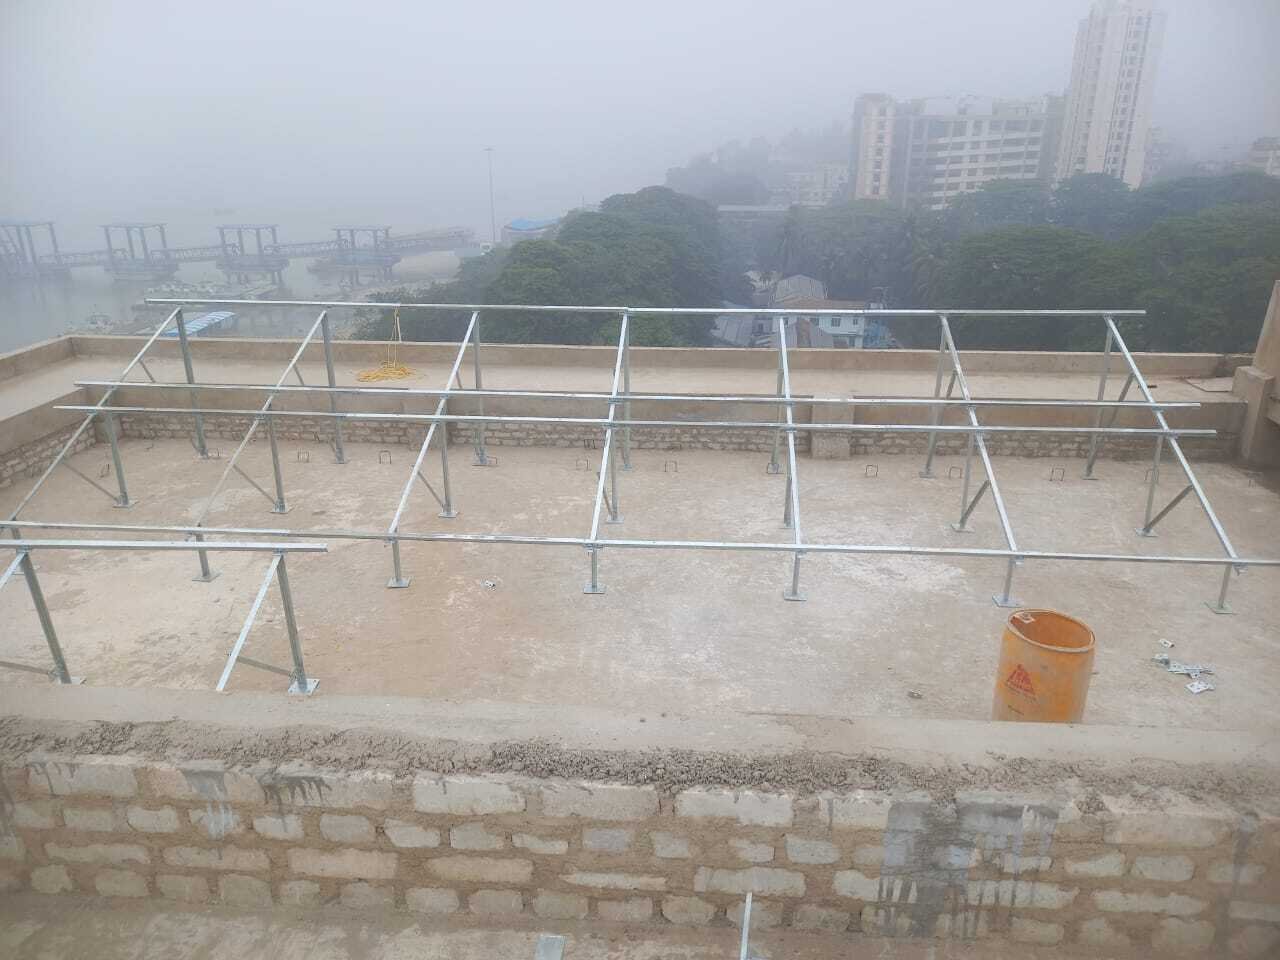
Solar Structure Installation
Installing solar panels is not simply about placing panels on a roof or open ground. A properly designed and installed solar mounting structure is essential for supporting the panels, maintaining the required orientation and tilt, and protecting the installation against wind and other environmental loads.
For project owners, choosing the right structure and ensuring proper installation can have a direct impact on the safety, durability and long-term performance of a solar project.
From rooftop solar systems and industrial installations to ground-mounted plants and solar car parking structures, every project has different structural requirements.
SmartCube India specializes in the manufacturing and installation of solar mounting structures for rooftop, ground-mounted, elevated, tin-shed, solar car parking and customized applications.
This guide explains the major steps involved in solar structure installation and what project owners should consider before, during and after installation.
What Is a Solar Mounting Structure?
A solar mounting structure is the supporting framework used to securely install solar panels on a particular surface.
Its main functions are to:
- Support the weight of solar panels
- Maintain the required panel orientation
- Provide the appropriate tilt angle
- Resist wind and environmental loads
- Keep panels securely positioned
- Provide structural stability
- Allow suitable access for inspection and maintenance
The structure can be installed on different surfaces depending on the project, including RCC rooftops, metal or tin roofs, open ground and parking areas.
SmartCube India manufactures structures using materials such as hot-dip galvanized steel and aluminium, depending on project requirements. Its website specifies customizable tilt angles and project-specific structural design.
Step 1: Understand the Solar Project Requirements
Before manufacturing or installing the structure, the project requirements need to be clearly defined.
Important information includes:
- Solar plant capacity
- Number of solar panels
- Panel dimensions and weight
- Roof or ground conditions
- Available installation area
- Desired panel orientation
- Required tilt angle
- Structure height
- Wind conditions
- Environmental exposure
- Access requirements
- Maintenance requirements
A residential rooftop system may require a completely different structure from a large industrial rooftop or MW-scale ground-mounted project.
Therefore, the structure should be designed according to the actual project rather than using a generic solution.
Step 2: Conduct a Site Assessment
A proper site assessment is one of the most important stages before installation.
For rooftop projects, the assessment should consider:
- Roof type
- Roof dimensions
- Roof condition
- Existing structural capacity
- Available installation area
- Access points
- Obstructions
- Drainage
- Shading
- Existing equipment
For ground-mounted projects, the assessment may include:
- Available land area
- Soil conditions
- Site accessibility
- Foundation requirements
- Ground levels
- Drainage
- Wind exposure
- Panel arrangement
SmartCube’s existing engineering workflow highlights site assessment, wind conditions, roof type, available space and structural requirements before finalizing the solar structure design.
Step 3: Check Structural and Load Requirements
The solar structure needs to support more than the weight of the panels.
Engineers may need to consider:
- Dead load
- Solar panel weight
- Wind load
- Applicable live loads
- Structure weight
- Foundation loads
- Environmental conditions
- Installation-specific forces
Wind load is particularly important because solar panels can experience significant uplift and lateral forces during strong winds.
For industrial rooftops and large solar projects, structural calculations should be carried out according to the project’s engineering requirements and applicable standards.
SmartCube’s website states that its solar structures are designed with consideration for wind-load resistance and references IS 875 and IS 800 in its design specifications.
Step 4: Select the Right Solar Structure Type
The next step is choosing the appropriate structure based on the installation location.
Rooftop Solar Structure
Rooftop structures are commonly used on:
- Residential buildings
- Commercial buildings
- Industrial factories
- Warehouses
- Institutions
They can be designed for RCC roofs as well as suitable metal-sheet roofs.
Ground-Mounted Solar Structure
Ground-mounted structures are installed on open land and are suitable for larger solar installations where sufficient land is available.
They provide flexibility in panel arrangement and can make inspection and maintenance more accessible.
SmartCube India has completed a 2 MW ground-mounted structure project in Patna, demonstrating its experience with larger solar infrastructure projects.
Elevated Solar Structure
Elevated structures raise the solar panels above the normal installation level.
They can be useful where the space beneath the panels needs to remain available for:
- Parking
- Storage
- Walkways
- Industrial activities
- Other commercial uses
Solar Car Parking Structure
Solar car parking structures combine parking infrastructure with solar generation.
They are suitable for:
- Shopping centres
- Offices
- Hospitals
- Residential complexes
- Commercial properties
- Institutional campuses
Tin-Shed Solar Structure
Industrial and commercial buildings with metal or tin-sheet roofs require suitable mounting methods that take the roof construction into account.
The fixing system should be selected carefully to provide structural stability while maintaining appropriate roof integrity.
Step 5: Finalize the Material
Material selection affects the strength, durability, weight and corrosion resistance of the solar structure.
Common materials include:
Galvanized Steel
Galvanized steel is widely used because it provides a combination of strength, durability and corrosion resistance.
It can be suitable for industrial, rooftop and ground-mounted applications depending on the project’s requirements.
Aluminium
Aluminium is lightweight and naturally resistant to corrosion.
It can be considered for applications where reduced structural weight and corrosion resistance are important.
The right material should be selected based on factors such as:
- Project location
- Wind conditions
- Environmental exposure
- Structural loads
- Roof capacity
- Budget
- Expected service life
SmartCube India’s solar structure solutions include hot-dip galvanized steel and aluminium options.
Step 6: Prepare the Structural Design
Once the site and project requirements have been evaluated, the structural design can be finalized.
The design may determine:
- Column dimensions
- Beam dimensions
- Purlin requirements
- Bracing
- Structure height
- Tilt angle
- Panel spacing
- Connection points
- Foundation requirements
- Fastener specifications
The design should also allow adequate access for future inspection and maintenance.
SmartCube’s product information includes structural components such as C-purlins, Z-purlins, hat purlins, bracings, rafters and columns for solar structure applications.
Step 7: Fabricate the Solar Structure
After the design has been finalized, the structural components are fabricated according to the required specifications.
Fabrication may involve:
- Cutting
- Drilling
- Welding
- Bending
- Assembly
- Surface treatment
- Galvanization or protective coating
- Quality inspection
Accurate fabrication is important because even small dimensional errors can create difficulties during installation.
For large projects, consistent fabrication quality is particularly important because multiple structural components need to fit together correctly at the installation site.
Step 8: Transport the Structure to the Site
Once fabrication is complete, the components need to be transported safely to the project location.
Proper planning is important for large or customized structures.
The project team should consider:
- Transportation route
- Component dimensions
- Loading and unloading
- Site accessibility
- Storage area
- Protection against damage
- Installation sequence
Keeping components organized can also reduce installation delays.
Step 9: Prepare the Installation Area
Before the structure is installed, the site should be prepared.
For rooftop installations, this may involve:
- Clearing unnecessary materials
- Identifying fixing locations
- Checking roof condition
- Marking installation points
- Ensuring safe access
- Confirming panel layout
For ground-mounted systems, site preparation may include:
- Marking foundation locations
- Ground preparation
- Foundation work
- Levelling
- Drainage considerations
The installation method should be selected according to the structural design and site conditions.
Step 10: Install the Main Structural Components
The main structural members are installed according to the approved design.
Depending on the structure, this can include:
- Columns
- Rafters
- Beams
- Purlins
- Bracings
- Mounting rails
- Support members
Every component should be correctly aligned and securely connected.
For rooftop installations, care should also be taken to avoid unnecessary damage to the existing roof.
Step 11: Check Alignment and Tilt
After the main structure has been assembled, alignment and tilt should be checked before the solar panels are installed.
Incorrect alignment can affect:
- Panel positioning
- Row spacing
- Shading
- Maintenance access
- Overall installation quality
The appropriate tilt angle depends on the project’s location, panel configuration and design requirements.
SmartCube India lists customizable tilt angles for its solar mounting structures, allowing the design to be adapted to different project requirements.
Step 12: Install the Solar Panels
Once the mounting structure has been inspected and approved, the solar panels can be installed.
Panels should be:
- Correctly positioned
- Properly aligned
- Securely fastened
- Installed according to the manufacturer’s requirements
- Kept at the designed spacing
Fasteners and mounting components should be appropriate for the structure and environmental conditions.
The installation team should also ensure that the panel layout does not create unnecessary shading or obstruct access for future maintenance.
Step 13: Carry Out Final Structural Inspection
A final inspection should be completed after installation.
The inspection may include checking:
- Structural alignment
- Connections
- Fasteners
- Bracing
- Panel supports
- Corrosion protection
- Roof fixing points
- Foundation condition
- Panel positioning
- Visible structural damage
Any loose connection or installation issue should be corrected before the project is handed over.
Step 14: Plan for Maintenance
Solar structures are designed for long-term outdoor use, but they should not be completely ignored after installation.
Periodic inspection can help identify:
- Corrosion
- Loose fasteners
- Damaged structural components
- Water accumulation
- Foundation problems
- Roof fixing issues
- Unusual movement
- Physical damage
Regular inspection can help identify potential issues before they become larger structural problems.
Common Solar Structure Installation Mistakes to Avoid
1. Skipping the Site Survey
Installing a structure without properly understanding the site can result in unsuitable design decisions.
2. Ignoring Wind Loads
Wind can create significant forces on solar panels and their supporting structures. Project-specific wind conditions should be considered during structural design.
3. Using Low-Quality Materials
Poor-quality materials or inadequate corrosion protection can reduce structural durability.
4. Choosing a Structure Only on Price
The cheapest structure may not provide the appropriate strength, material quality or long-term performance.
5. Ignoring Roof Capacity
For rooftop projects, the existing roof must be evaluated before adding a solar structure and panels.
6. Poor Panel Layout
Improper panel spacing or arrangement can create shading and maintenance-access problems.
7. Inadequate Fastening
Loose or unsuitable connections can compromise structural stability.
8. Ignoring Future Maintenance
The structure should be designed and installed with reasonable access for inspection and maintenance.
How Long Does Solar Structure Installation Take?
Installation time depends on several factors, including:
- Project size
- Structure type
- Roof or ground conditions
- Fabrication requirements
- Site accessibility
- Number of panels
- Foundation requirements
- Installation complexity
SmartCube India’s current solar mounting structure information indicates an installation timeframe of approximately 1–3 days for applicable systems, although actual project duration can vary depending on site and project conditions.
Large industrial or utility-scale projects can naturally require considerably more time.
What Should Project Owners Ask a Solar Structure Manufacturer?
Before finalizing a supplier, project owners should ask:
- What material will be used?
- What is the expected structural life?
- How is corrosion protection provided?
- What wind loads has the structure been designed for?
- Has the site been properly assessed?
- Is the structure customized for the project?
- What standards are followed during design?
- What type of fasteners are being used?
- Is installation included?
- What maintenance support is available?
These questions can help project owners compare suppliers based on engineering quality rather than price alone.
Why Choose SmartCube India for Solar Structure Installation?
SmartCube India is a solar structure manufacturer and fabrication company based in Howrah, West Bengal. The company was established in 2018 and provides solar structures and customized fabrication solutions for different applications.
Its solar mounting solutions include:
- Rooftop solar structures
- Ground-mounted solar structures
- Elevated solar structures
- Solar car parking structures
- Tin-shed solar structures
- Customized solar structures
- Solar tracker structures
SmartCube’s website highlights experience across 400+ completed projects, including a 2 MW solar car parking project at Ranchi High Court and a 2 MW ground-mounted project in Patna.
The company serves projects across West Bengal, Jharkhand, Bihar, Odisha, Assam and nearby regions, providing manufacturing and installation support for different solar applications.
Frequently Asked Questions
What is the first step in solar structure installation?
The first step is understanding the project requirements and conducting a proper site assessment. The roof or ground condition, available space, wind conditions, panel configuration and structural requirements should be evaluated before fabrication.
Which material is best for a solar mounting structure?
There is no single material that is best for every project. Galvanized steel and aluminium are commonly used, and the appropriate choice depends on structural loads, environmental conditions, corrosion exposure, weight and project requirements.
Can solar structures be installed on factory rooftops?
Yes. Solar structures can be designed for suitable industrial rooftops, including RCC and metal-sheet roofs. However, the existing roof condition and structural capacity should be evaluated before installation.
How important is wind load in solar structure design?
Wind load is an important consideration because solar panels and their supporting structures can experience uplift and lateral forces. The structure should be designed according to the project’s location and applicable engineering requirements.
How long does a solar mounting structure last?
The service life depends on material quality, corrosion protection, design, installation quality and environmental exposure. SmartCube’s website states a structure life of 25 years or more for its listed solar mounting solutions, subject to applicable conditions.
Does SmartCube India provide customized solar structures?
Yes. SmartCube India provides customized solar mounting structures based on project requirements such as roof type, panel configuration, site conditions, height, tilt angle and structural requirements.
Conclusion
A solar mounting structure is the foundation of a safe and durable solar installation. Proper site assessment, structural design, material selection, accurate fabrication and professional installation all play an important role in the long-term performance of a solar project.
For project owners, the goal should not simply be to install a structure at the lowest possible cost. The structure should be appropriately engineered for the site, environmental conditions, panel configuration and intended service life.
Whether you are planning a rooftop solar system, industrial solar installation, ground-mounted plant or solar car parking project, working with an experienced solar structure manufacturer can help ensure that the supporting framework is designed and installed correctly.
SmartCube India provides customized solar mounting structures and fabrication solutions for residential, commercial and industrial applications.
Planning a solar project? Contact SmartCube India to discuss your site requirements and get a customized solar structure solution.